
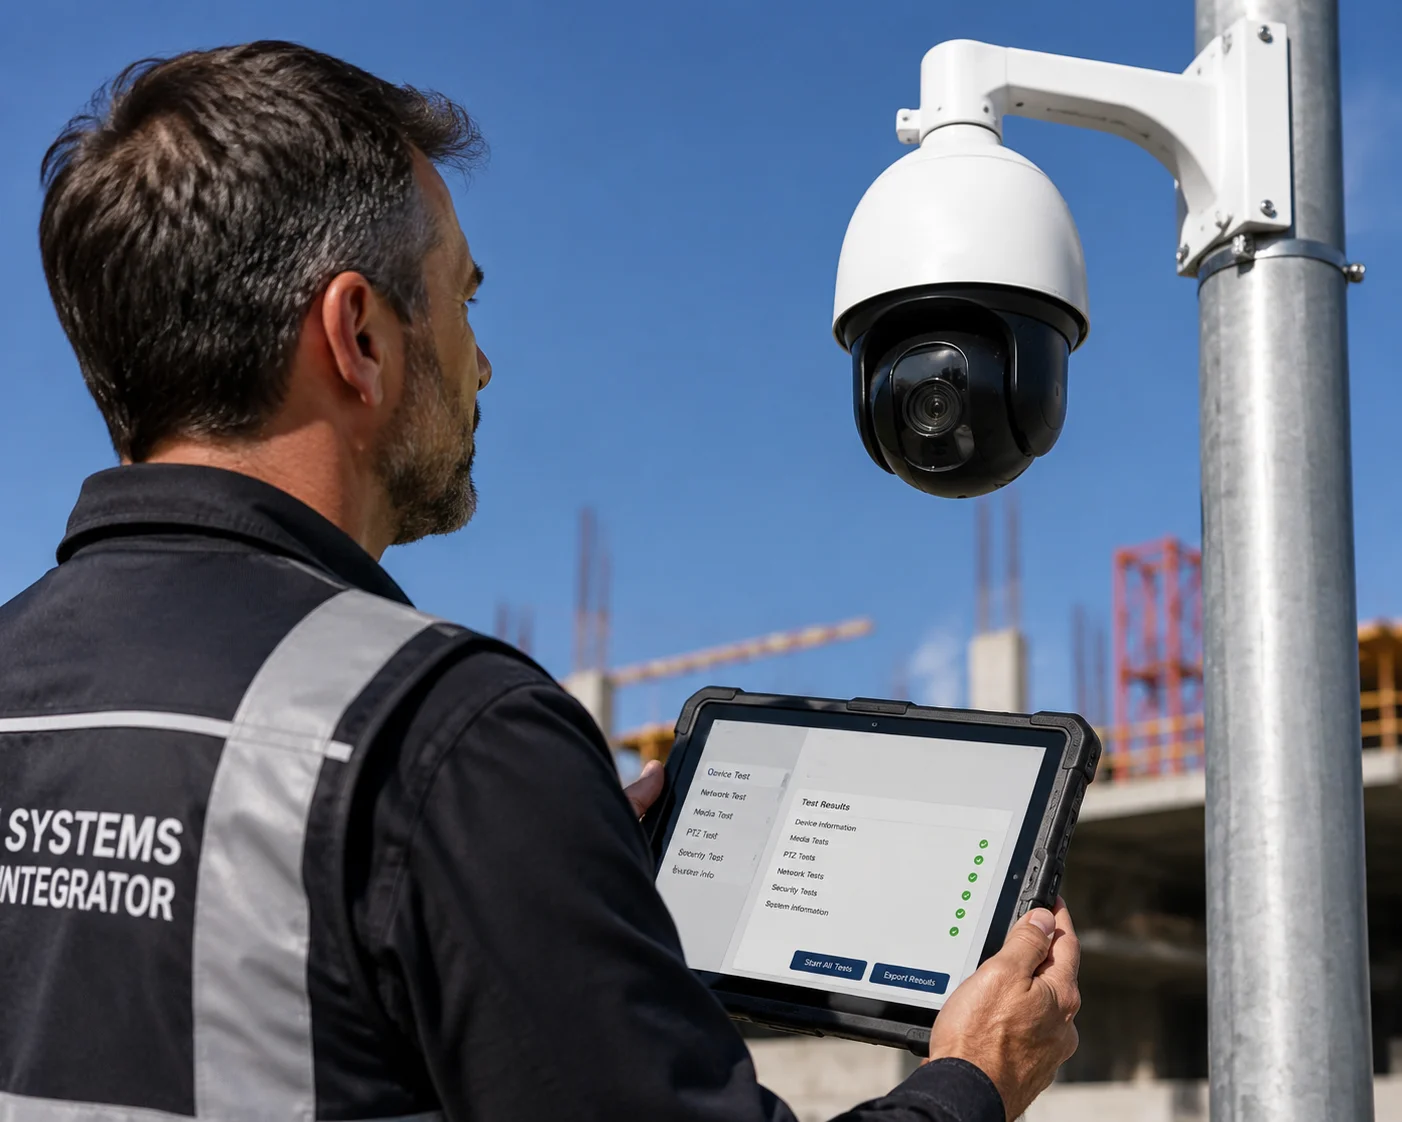
I’ve seen too many integrators get burned by cameras that claim “ONVIF1 compatible” but fail on real job sites. The protocol breaks, the NVR drops the feed, and you’re stuck driving 200 miles to fix it. This problem is avoidable.
To verify if a manufacturer’s protocol truly passed the official Device Test Tool (DTT), you need to cross-check three things: the official ONVIF Conformant Products database, the actual DTT test report with XML logs showing a “PASS” verdict, and a hands-on second verification using tools like ONVIF Device Manager on a real sample unit.
 ONVIF Device Test Tool verification for PTZ security cameras
I wrote this guide because I get asked this question almost every week by system integrators placing their first bulk order. Below, I’ll walk you through the exact steps to verify DTT compliance, what to look for in the test logs, and how to avoid the costly mistakes that come from trusting a spec sheet alone.
Table of Contents
Can You Provide the DTT Test Log Showing 100% Compliance with Profile S and T?
I’ve had customers ask me for DTT logs, and honestly, that’s exactly what a smart buyer should do. If a manufacturer hesitates to share them, that’s your first red flag.
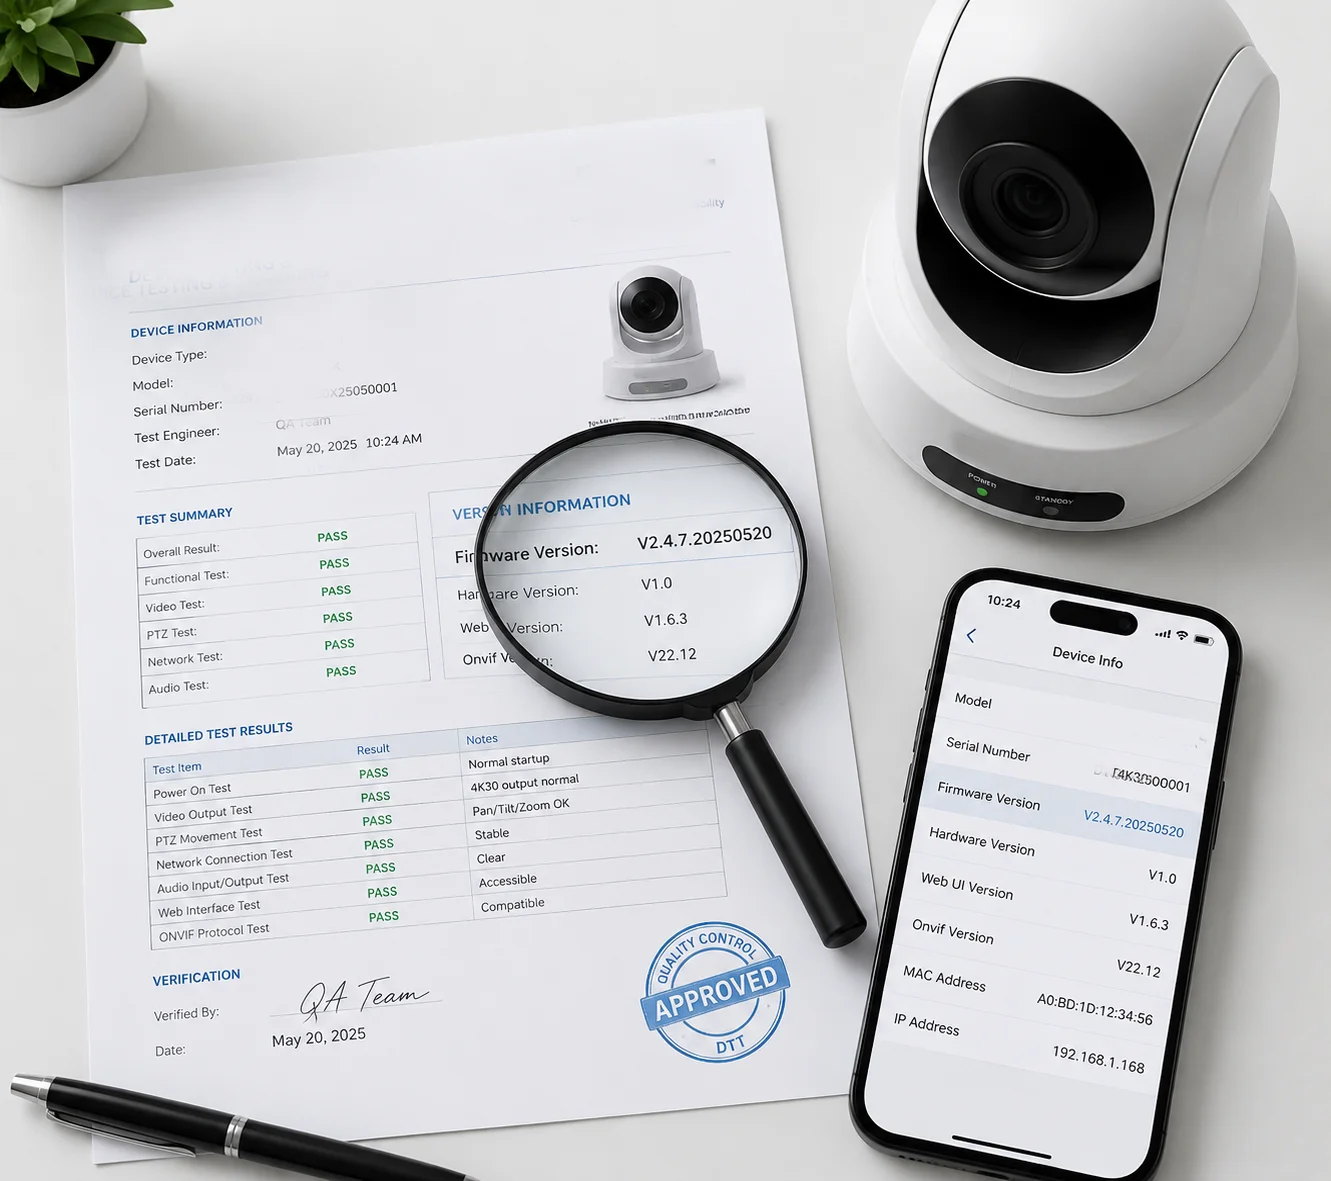
A legitimate DTT test log is an XML-format file generated automatically by the ONVIF Device Test Tool. It records every single command sent to the camera and every response received. The final section contains a “Verdict” field — it must say “PASS” for each tested feature under Profile S and Profile T.
 DTT test log XML format showing PASS verdict for Profile S and T
What Does a Real DTT Log Look Like?
A real DTT log is not a PDF summary or a screenshot. It is a structured XML2 file. Each test case has its own entry. For example, when the tool tests GetProfiles, it sends the SOAP3 request to the camera and records the exact XML response. If the camera returns the correct data in the correct format, the verdict for that test case is “PASS.” If the response is malformed, missing, or times out, the verdict is “FAIL” or “WARNING.”
Here’s what you should look for inside the log:
| Log Element | What It Tells You | Red Flag If… |
|---|---|---|
| Device Information | Firmware version, model number, manufacturer name | It doesn’t match the product you’re buying |
| Test Case Verdict | PASS, FAIL, or WARNING for each command | Multiple FAILs appear, especially on core streaming commands |
| Timestamp | Date and time the test was run | The date is very old or doesn’t match the current firmware version |
| Profile Scope | Which profiles were tested (S, T, G, etc.) | Only Profile S was tested but the seller claims Profile T support |
The Difference Between Profile S and Profile T
Profile S covers basic video streaming. It includes commands like GetStreamUri, GetProfiles, and PTZ control4. If a camera passes Profile S, it means your NVR can pull a live video stream and control pan-tilt-zoom functions through ONVIF.
Profile T is newer and more advanced. It adds support for H.265 encoding5, imaging settings (brightness, contrast, exposure), and advanced event handling like motion detection metadata. For modern projects, especially those using AI analytics or edge recording, Profile T6 compliance is not optional — it’s a must.
How to Read the Verdict Section
Go straight to the end of the log file. Look for the summary table. Each test case will be listed with its result. A “WARNING” is not the same as a “FAIL.” Warnings usually mean a non-mandatory feature is not supported. For example, if the camera doesn’t support a specific audio backchannel command, it may show a warning. That’s acceptable in most cases.
But if you see a FAIL on GetStreamUri or GetSnapshotUri, stop right there. That means the camera cannot reliably deliver video through ONVIF. No amount of firmware patching on your end will fix a fundamental protocol failure.
My Recommendation
At Loyalty-Secu, we provide the full DTT log file to any customer who requests it. We also include a screen recording of the entire test session. This way, you can see the test running in real time, not just the final output. If your current supplier can’t do this, ask yourself why.
How Does Passing the DTT Reduce the Risk of “Device Disconnected” Errors on My NVR?
Every integrator I talk to has the same nightmare: the camera shows “Device Disconnected” on the NVR at 2 AM, and the client calls in a panic. I’ve spent years working to eliminate this exact problem.
Passing the DTT means the camera’s protocol stack correctly handles the keep-alive handshake, session renewal, and error recovery commands that NVRs rely on. When these commands work properly, the NVR maintains a stable connection. When they don’t, the NVR drops the device — and you get the dreaded “Device Disconnected” error.
 NVR device disconnected error caused by ONVIF protocol failure
Why “Device Disconnected” Happens at the Protocol Level
Most people think “Device Disconnected” means a network cable came loose. Sometimes it does. But in my experience, at least 60% of these errors come from the protocol layer, not the physical layer. Here’s what actually happens:
- The NVR sends a keep-alive request to the camera every few seconds.
- The camera must respond within a set timeout window.
- If the camera’s ONVIF implementation is buggy, it may fail to respond — or respond with malformed XML.
- The NVR interprets this as a lost device and drops the connection.
- The NVR may or may not attempt to reconnect automatically.
A camera that passed the DTT has been verified to handle these keep-alive cycles correctly. The test tool specifically checks session management commands like Renew and Subscribe under the Event Service. If these pass, your NVR will maintain a stable session.
The Hidden Cost of Protocol Failures
Let me put this in business terms. If you’re David Miller, running a security integration company, and you deploy 50 cameras across a remote construction site, each “Device Disconnected” event costs you money. Here’s a rough breakdown:
| Cost Factor | Estimated Cost per Incident | Annual Impact (50 cameras, 5% failure rate) |
|---|---|---|
| Truck roll to remote site | $300 – $800 | $750 – $2,000 |
| Technician labor (2-4 hours) | $150 – $400 | $375 – $1,000 |
| Client downtime penalty | $500 – $2,000 | $1,250 – $5,000 |
| Reputation damage | Hard to quantify | Loss of repeat business |
These numbers add up fast. A $50 savings per camera on a cheaper, untested unit can easily turn into a $5,000 annual loss in service calls.
What the DTT Specifically Tests for Connection Stability
The DTT doesn’t just check if the camera can stream video once. It tests repeated connection cycles. It tests what happens when the session token expires. It tests whether the camera can handle multiple simultaneous ONVIF sessions — because in a real deployment, your NVR, your VMS, and your mobile app might all connect at the same time.
My Approach at Loyalty-Secu
We run our cameras through a 72-hour continuous connection test after the DTT. We simulate NVR polling at 5-second intervals and log every response. If a single keep-alive fails during that window, the firmware goes back to our R&D team. We don’t ship until the log is clean. This is why our integrator partners report near-zero “Device Disconnected” incidents in the field.
What Version of the ONVIF Device Test Tool Was Used for the Latest Firmware?
I’ve caught this issue more than once: a supplier shows a DTT report from 2019, but the firmware on the camera you receive was updated in 2024. That old report means nothing.
The version of the ONVIF Device Test Tool matters because each new version adds updated test cases, stricter validation rules, and support for newer profiles. A camera tested with DTT v18.06 may not pass DTT v23.12. Always ask for the DTT version number and confirm it matches the current release on the ONVIF website.
 ONVIF Device Test Tool version check for firmware validation
Why the DTT Version Matters
The ONVIF standard evolves. New profiles get added. Existing commands get updated. The DTT is updated to match. If a manufacturer tested their camera with an old version of the DTT, the test may have skipped checks that are now mandatory.
For example, DTT versions released after 2020 include stricter checks for Profile T. Older versions may not test H.265 streaming properly. If your project requires H.265 — and most modern projects do — an old DTT report gives you zero assurance.
How to Check the DTT Version
The DTT version is printed on the first page of the test report. It’s also embedded in the XML log file header. Here’s what to look for:
- DTT Version Number: Something like
v23.06orv22.12. - Test Framework Version: This is the underlying engine. It should also be recent.
- ONVIF Core Specification Version: This tells you which version of the ONVIF standard was used as the baseline.
Cross-Referencing with Firmware
This is the step most buyers skip. You need to match two things:
- The firmware version listed in the DTT report.
- The firmware version on the camera you actually receive.
If they don’t match, the test report is invalid for your unit. Firmware updates can change how the ONVIF stack behaves. A bug fix in one area might introduce a regression in another. I’ve seen it happen.
What We Do at Loyalty-Secu
Every time our R&D team releases a new firmware version, we re-run the DTT with the latest available version of the tool. We don’t recycle old reports. The test report you receive will always match the firmware on the camera in your hands. We also note the DTT version clearly on the report cover page so you can verify it yourself on the ONVIF website7.
| Verification Step | What to Check | Where to Find It |
|---|---|---|
| DTT Version | Must be a recent release (within 12 months) | First page of DTT report or XML header |
| Firmware Version | Must match the camera you’re purchasing | DTT report header vs. camera web interface |
| ONVIF Spec Version | Should be 21.06 or newer for Profile T | DTT report metadata |
| Profile Coverage | S, T, and G if needed | DTT report summary section |
If your supplier can’t answer the simple question “What DTT version did you use?”, that tells you everything you need to know about their testing rigor.
Does the DTT Test Include the 4G/LTE Latency Simulation for Remote Devices?
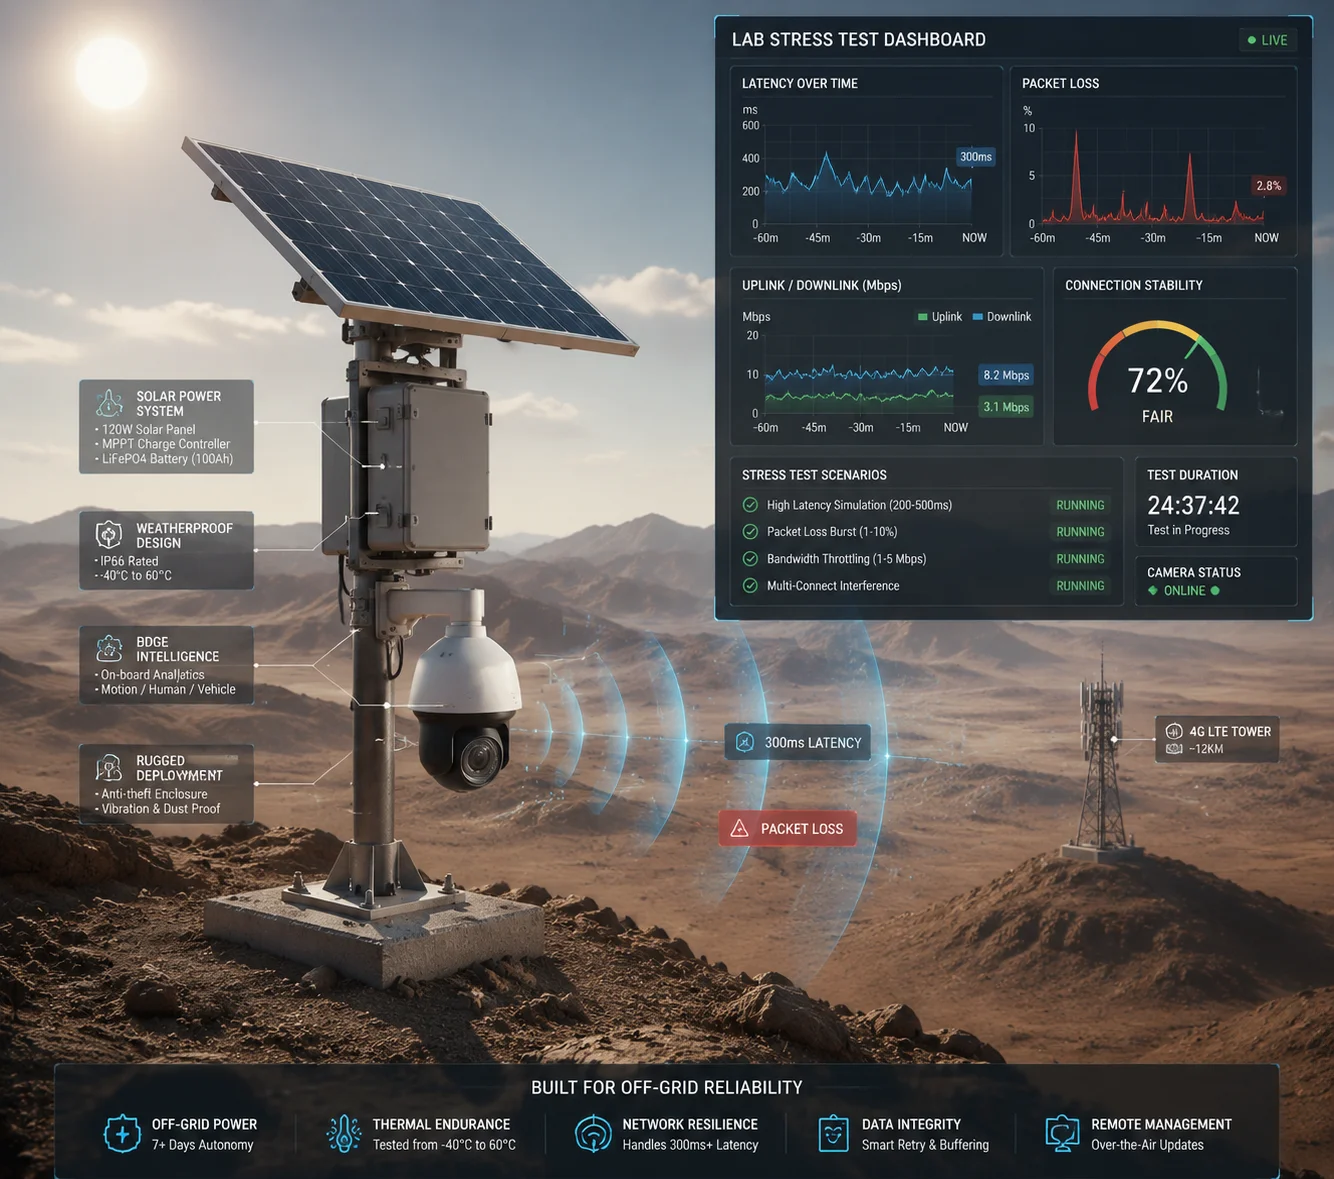
This is the question that separates experienced integrators from beginners. I deal with 4G solar-powered PTZ cameras every day, and I can tell you — the DTT alone is not enough for off-grid deployments.
No, the standard ONVIF Device Test Tool does not simulate 4G/LTE8 network conditions. The DTT runs on a local Ethernet connection with minimal latency. For remote 4G devices, you need additional testing that simulates high latency (200-500ms), packet loss (2-10%), and intermittent connectivity to verify the protocol stack won’t collapse in real-world conditions.
 4G LTE latency simulation test for solar PTZ security cameras
The Gap Between Lab and Field
The DTT is a lab tool. It connects to the camera over a clean, fast, local network. Latency is under 1ms. Packet loss is zero. Bandwidth is unlimited. This is nothing like a 4G connection on a remote construction site or a solar-powered farm camera in rural Montana.
In the real world, 4G connections have:
- Latency: 50ms to 500ms, depending on signal strength and carrier congestion.
- Packet loss: 1% to 10%, especially during peak hours or bad weather.
- Jitter: Variable delay that causes ONVIF session timeouts.
- Bandwidth limits: Data caps that force lower bitrate streams.
A camera that passes the DTT with flying colors on Ethernet can completely fall apart on 4G. The ONVIF keep-alive messages time out. The RTSP stream drops. The PTZ commands queue up and execute with a 3-second delay, making the camera unusable for real-time tracking.
How We Test for 4G at Loyalty-Secu
Since the DTT doesn’t cover this, we built our own supplemental test protocol. Here’s what we do:
Step 1: Network Emulation. We use a network emulator tool to inject artificial latency (300ms), packet loss (5%), and jitter (50ms variance) between the test computer and the camera. This simulates a mid-quality 4G connection.
Step 2: Keep-Alive Stress Test. We run the ONVIF session for 48 hours under these degraded conditions. We log every keep-alive request and response. If the session drops and doesn’t auto-recover within 30 seconds, the firmware fails our test.
Step 3: PTZ Command Latency Test. We send 100 consecutive PTZ commands (pan left, tilt up, zoom in, preset recall) and measure the round-trip time for each. If the average response time exceeds 2 seconds on a simulated 4G link, we optimize the command queue in firmware.
Step 4: Antenna Disconnect Test. We physically unplug the 4G antenna for 60 seconds, then reconnect it. The camera must re-establish the ONVIF session and resume streaming without manual intervention. This simulates a temporary signal loss — which happens constantly in the field.
Why This Matters for Your Business
If you’re deploying solar 4G PTZ cameras for a client, and those cameras drop offline every time the 4G signal dips, you will get called back to the site. That truck roll costs you money and credibility. The DTT report won’t protect you from this. Only real-world 4G testing will.
This is exactly why our integrator partners choose Loyalty-Secu for off-grid projects. We don’t just pass the DTT. We go beyond it. We test under the conditions your cameras will actually face. And we share those test results with you — because you deserve to know what you’re buying.
Conclusion
Don’t trust a spec sheet. Demand the DTT log, verify the firmware version, check the ONVIF database, and for 4G deployments, insist on latency simulation test results. Your project’s reliability depends on it.
1. Official website for the ONVIF standard, profiles, and conformance tools. ↩︎ 2. Extensible Markup Language used for structured data exchange, including ONVIF test logs. ↩︎ 3. Protocol for exchanging structured information in web services, used in ONVIF commands. ↩︎ 4. Pan-Tilt-Zoom functionality standardised under ONVIF profiles. ↩︎ 5. High Efficiency Video Coding standard, supported under ONVIF Profile T. ↩︎ 6. Advanced ONVIF profile supporting H.265, imaging settings, and advanced event handling. ↩︎ 7. Central resource for ONVIF specifications, tools, and conformance lists. ↩︎ 8. Long-Term Evolution standard for wireless broadband, used in remote camera deployments. ↩︎