
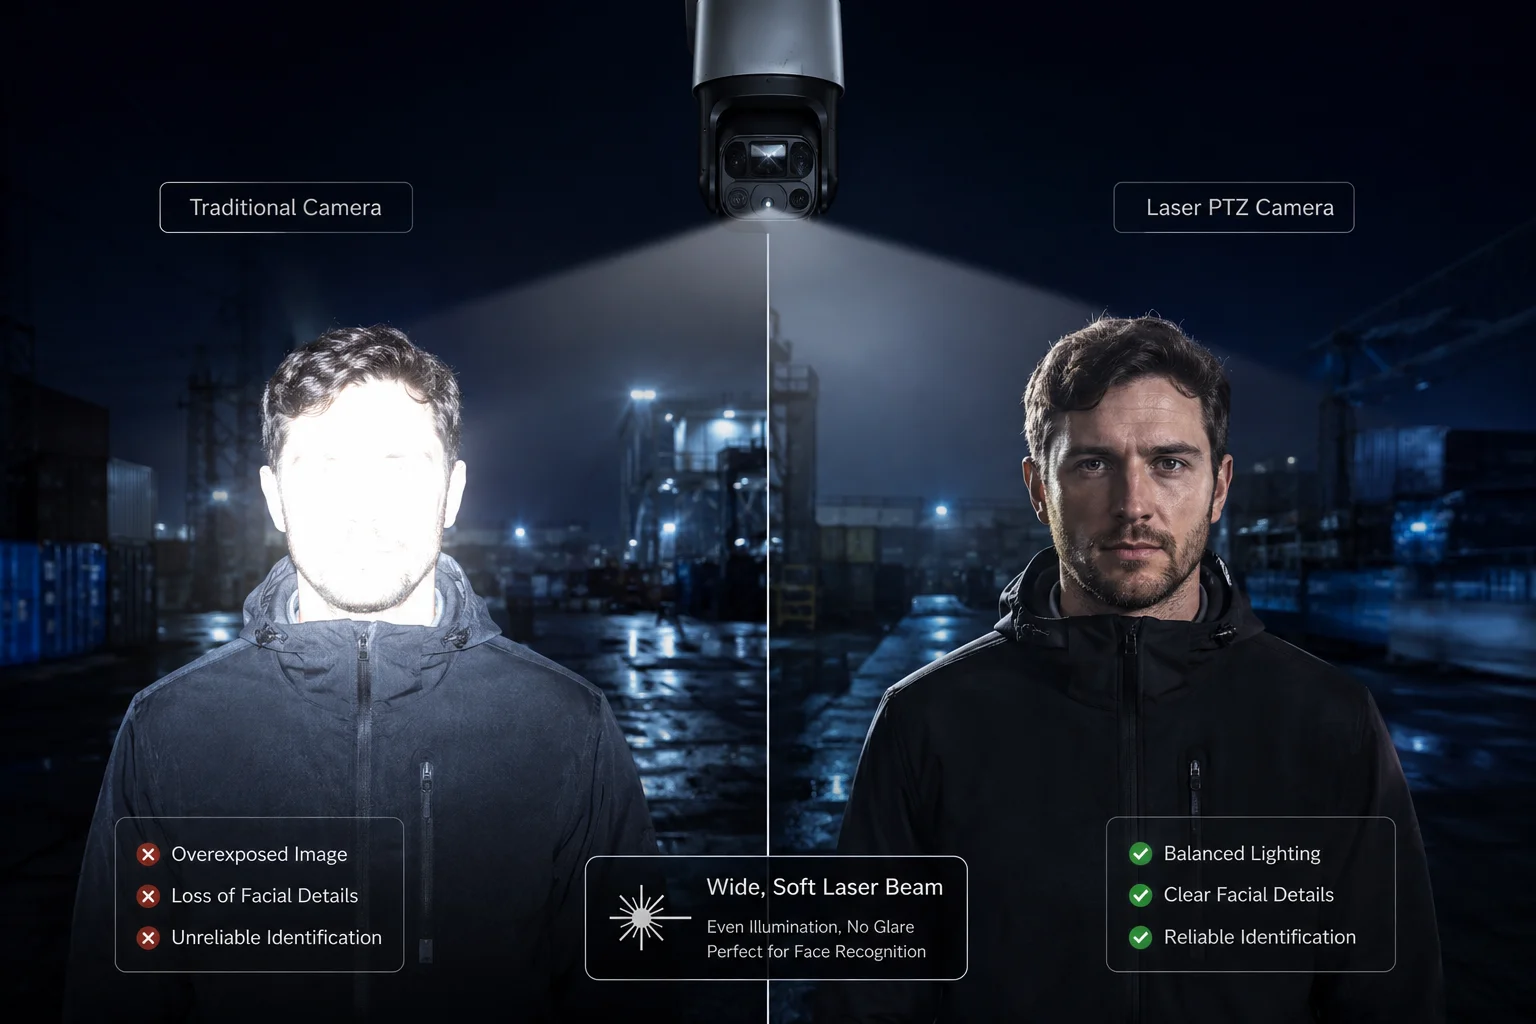
I have seen close targets turn a strong night scene into a white wall. That is a real problem when I need clear faces and stable evidence.
A good laser PTZ camera1 prevents overexposure by linking zoom, beam angle, power, and AI exposure control2. When a face appears close to the lens, the system spreads the beam, lowers laser output, and adjusts exposure so the face stays clear without washing out the scene.
 laser PTZ face overexposure
I want to break this down in a simple way, because the real value is not just bright night vision. The real value is controlled light, clean detail, and fewer bad captures in the field.
Table of Contents
Does the “Anti-flare” algorithm dim the laser instantly when a person’s face is detected?
I know this question matters because a face can look fine in one frame and become blown out in the next. That can ruin a report or a project demo fast.
Yes, a good anti-flare system3 can dim the laser very fast when it detects a face, but it does more than that. It also checks brightness, scene distance, and exposure time, so the camera can protect facial detail instead of only reacting to one object.
![]() anti flare face detection laser dimming
anti flare face detection laser dimming
I like to think of anti-flare as a fast guard, not a simple switch. If I only dim the laser at one instant, I may still get a bad frame right before or after the change. That is why strong systems use a few layers at the same time. First, face detection4 tells the camera that human skin is in the scene. Then the AE engine checks if the bright points on the face are close to saturation. After that, the camera reduces power, shortens exposure, or shifts the balance in a way that keeps the face readable. In real work, this matters a lot for gates, farm roads, and parking lots where a person can move from far away to very close in seconds.
How the response chain works
| Step | What I see | What the camera does |
|---|---|---|
| Face appears | Skin area enters the frame | AI marks the face |
| Brightness rises | White spots start to grow | AE reduces sensor exposure |
| Laser is too strong | Face looks flat or shiny | Laser power drops |
| Scene stays close | Target remains near camera | Beam angle widens |
I also need to be careful with the word “instantly.” In the field, “instant” sounds nice, but the best result often comes from a very fast and very smart sequence. If the system only cuts power hard, the face may become too dark. If it only changes camera exposure, the background may become noisy. So the best anti-flare design keeps a balance. It uses the face area as the main focus. It can also treat the face as an ROI, which means the camera gives that area more attention than the rest of the frame. This is especially useful for David Miller style buyers, because they want stable proof, not just a bright image. I also know that false detections can happen. A shiny helmet, a reflective sign, or even pale clothing can confuse weak systems. That is why I value an algorithm that checks more than one signal before it changes output. In short, anti-flare should react fast, but it should also stay calm and steady.
How does the system handle “Retro-Reflective” clothing that can blind standard night vision?
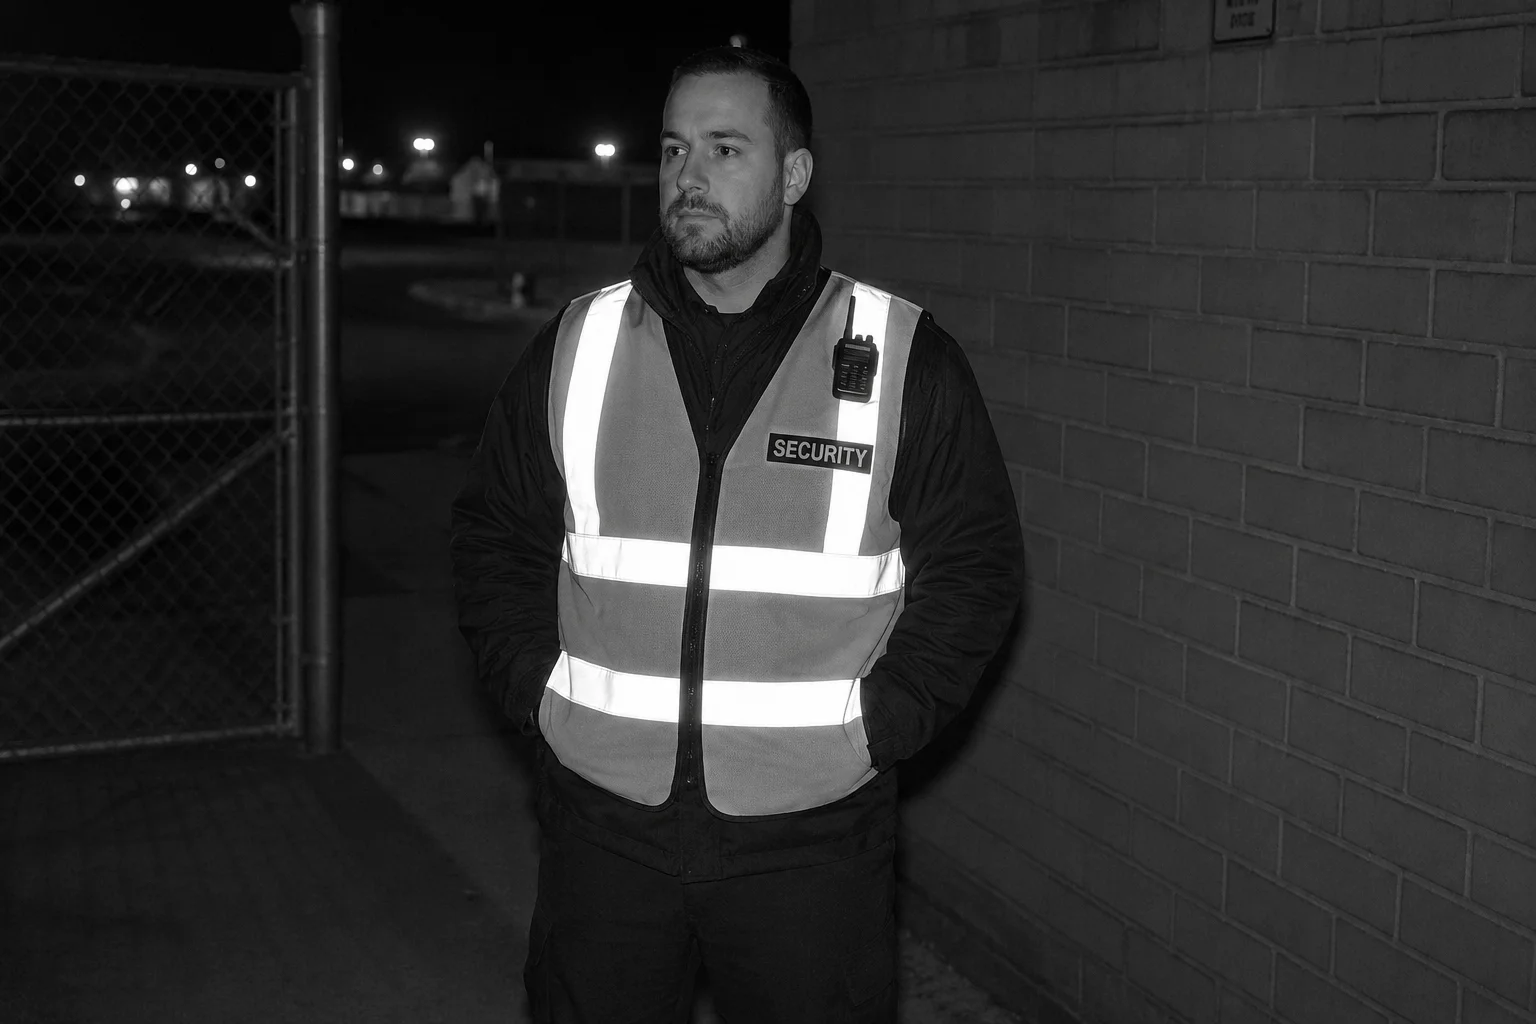
I have seen reflective vests, tape, and certain work clothes make a normal night camera look weak. The target does not need to be close to cause trouble.
A better laser night vision system handles retro-reflective clothing by reducing glare at the source, improving exposure control, and using AI to protect important detail. It does not rely on brightness alone, because reflective material can bounce light back and overwhelm the sensor.
 retro reflective clothing night vision
I need to separate this into physics and software, because both parts matter. Retro-reflective clothing5 sends a lot of light back to the camera. That is very different from a dark coat or a normal shirt. A standard infrared setup can see that reflection and think the whole scene is brighter than it really is. Then the camera may cut exposure too much, and the face or body shape becomes hard to read. In my view, this is one of the best tests of a serious industrial camera. If the system can deal with reflective clothing, it can usually handle many other hard scenes too.
Why reflective clothing is hard
| Problem source | Result | Risk |
|---|---|---|
| Reflective tape | Strong bounce-back light | Hot spots on the image |
| Safety vest | Large bright area | Lost body detail |
| Wet fabric | Mixed reflection | Uneven brightness |
| Close range | Light returns very fast | Sensor saturation |
The best systems solve this in layers. First, the laser or IR light should not be too narrow when the target is near. A wide beam lowers the energy density and reduces the chance of a hot spot. Second, the camera should use exposure logic that watches for over-bright areas and reduces gain or shutter speed before the image breaks. Third, AI10 can help by separating a real human target from a bright object. That matters when a reflective vest is moving, because the camera should still keep the body shape and face clear. I also care about lens coating and internal flare control. Good optics can reduce stray light inside the module, and that helps a lot when strong reflections are in the scene. In real deployments, I would expect a strong system to keep the face usable even if the chest or shoulders are brighter than normal. I would also expect the image to stay stable when the target turns sideways. If the system only looks good in one angle, it is not good enough for real jobs. David Miller buyers usually know this right away, because they test in hard light, not in perfect demo scenes. That is why I value reflective-scene control as a core feature, not a bonus.
Can I set a manual “Laser Power Cap” for sites where targets are likely to be within 50 meters?
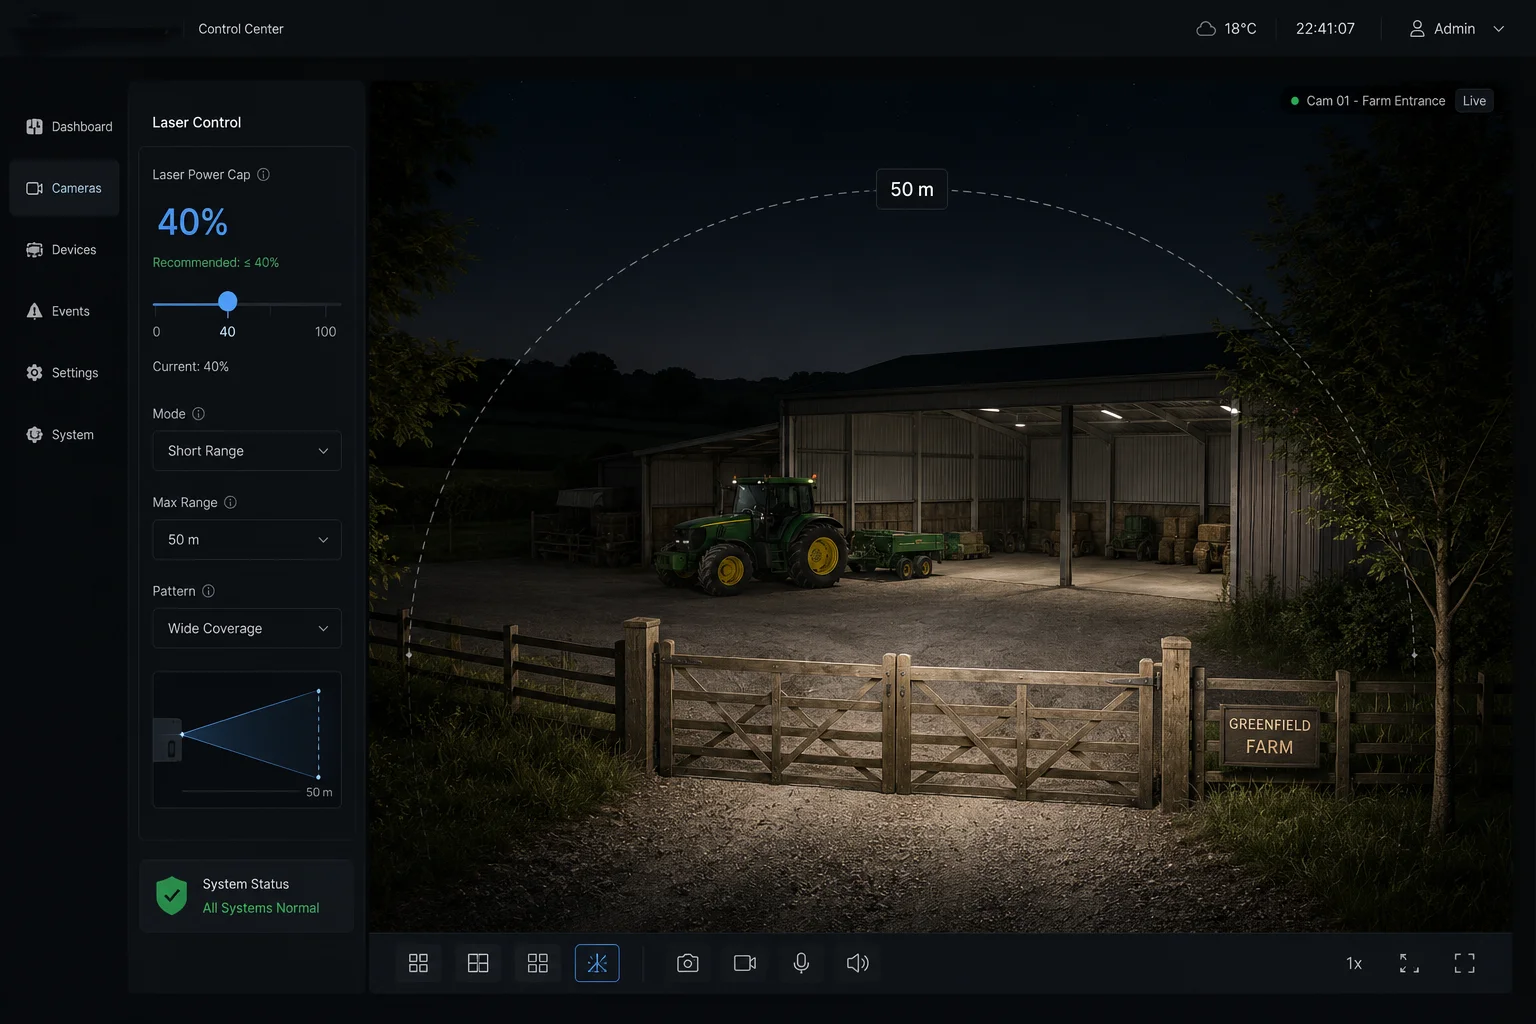
I often hear this from installers who work on yards, fences, or small sites. They do not want full power when the target is always close.
Yes, a manual laser power cap6 is useful for short-range sites. It lets me limit output before the camera enters a close scene, so the system stays safe, avoids overexposure, and gives smoother facial detail at distances under 50 meters.
 manual laser power cap close range
I think a power cap is one of the most practical tools for real installers. Not every site needs maximum laser output. In fact, many sites work better with less. If I know the target is usually within 50 meters, I do not want the camera to keep pushing strong light into a small space. That can create glare, white faces, and unstable auto exposure. A cap gives me control, and control is often better than raw power. It also helps with device life, because the module does not need to run at the top all the time. For a manufacturer like , this kind of feature fits the needs of system integrators and project teams who want predictable results.
Manual cap settings and use cases
| Site type | Suggested cap behavior | Main goal |
|---|---|---|
| Small gate | Low to medium cap | Protect faces at close range |
| Farm fence | Medium cap | Keep detail across mixed distances |
| Parking lot | Adaptive cap | Balance cars and people |
| Warehouse yard | Fixed cap with test mode | Stable image in repeat use |
I also think the best manual cap design should still allow smart auto adjustment inside the safe limit. That means I can set the ceiling, but the camera can still move below that ceiling when the scene needs it. This is much better than a hard locked output, because the target distance can change even in the same site. Someone may walk near the gate, then step back, then move under a light pole. The camera should not behave like a dumb flashlight. It should behave like a controlled system. I would also recommend using the cap together with zoom-laser linkage9. If the lens zooms in, the beam angle can narrow a bit. If the target comes close, the beam can spread out. This pairing makes the power cap more useful, because the system is not fighting itself. In short, manual capping is not about making the image darker. It is about keeping the image usable across real site conditions.
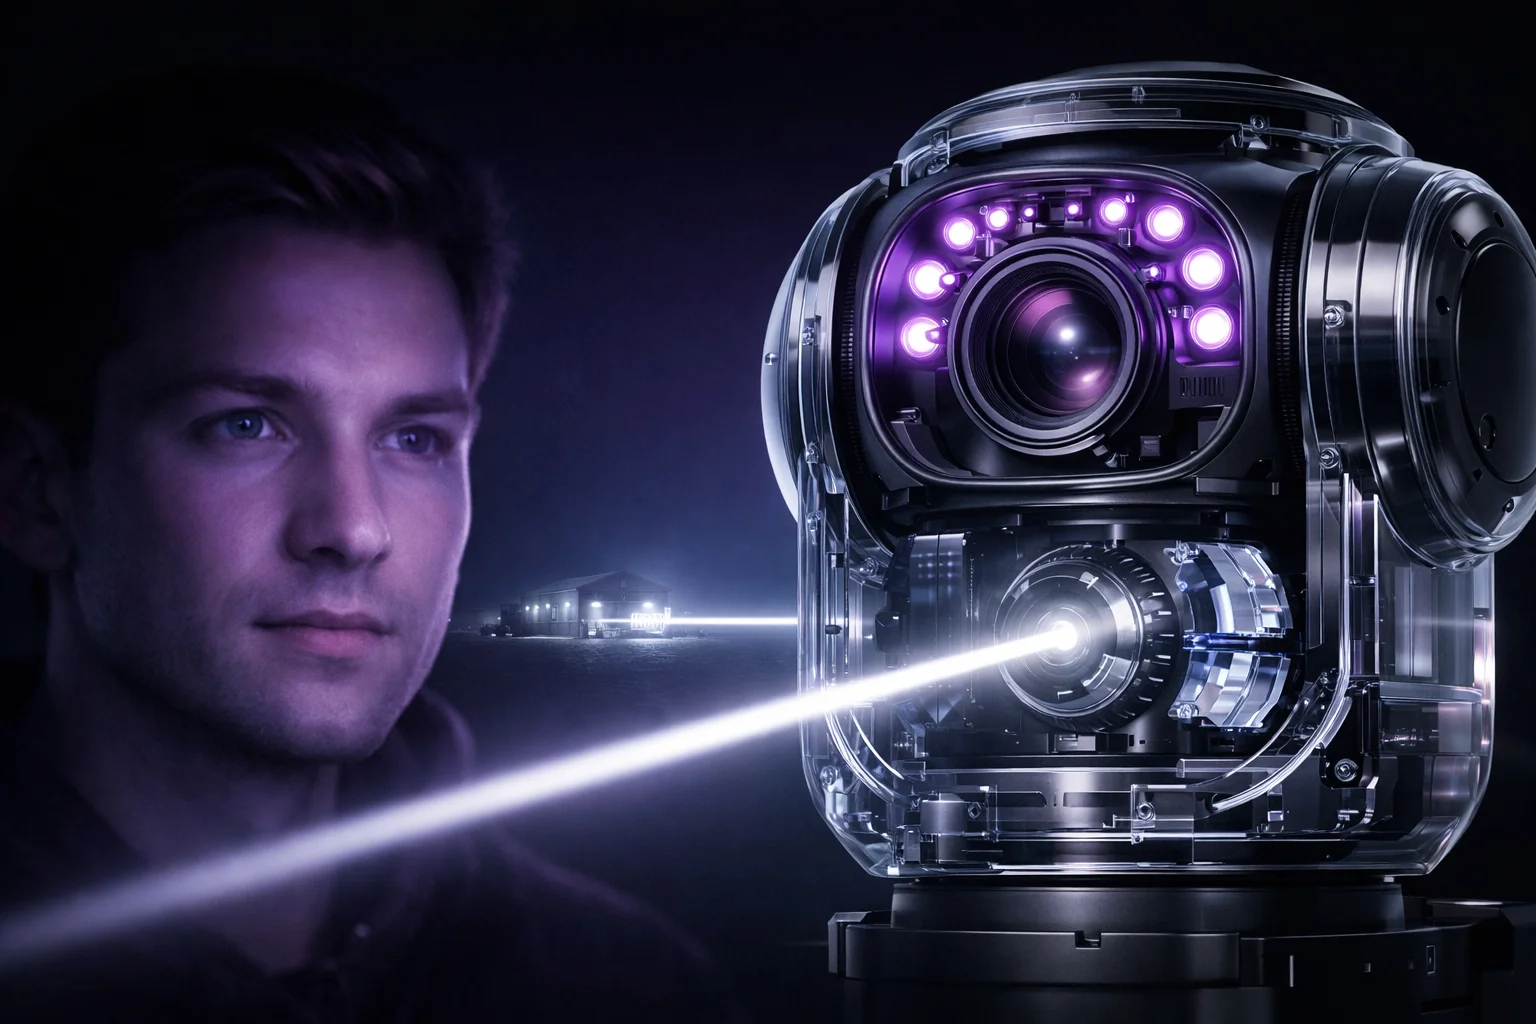
Will the camera switch from Laser to IR LEDs automatically to maintain the best facial detail?
I know this sounds simple, but it is not simple in real use. A bad switch can make the image jump and lose detail.
Yes, a smart camera can switch between laser and IR LEDs7 automatically if the design supports both light sources. It should choose the option that gives the cleanest face detail, lowest glare, and best balance for the current distance and scene brightness.
 laser to ir leds automatic switch
I want to stress that automatic switching is only good when the logic is stable. If the camera flips back and forth too often, the video looks messy. If it stays on laser too long, close targets may wash out. If it uses only IR LEDs in a long-range scene, the picture may become too weak. So the best system watches distance, reflectivity, and face clarity before it changes light source. This is where a professional R&D-led manufacturer can stand out. I can design the logic so the switch feels smooth, not rough. I can also tune the thresholds based on the site type. A farm, a border area, and a school gate do not need the same rules.
Laser vs IR LED behavior
| Light source | Strength | Weak point |
|---|---|---|
| Laser | Strong range and tighter control | Can overexpose close faces |
| IR LED | Softer for near scenes | Less reach at long distance |
| Auto switch | Best balance when tuned well | Needs careful threshold logic |
In my view, the ideal switching system is not just about brightness. It is about detail. Facial detail depends on enough light, but not too much light. It also depends on shutter speed, gain, and how the camera handles hotspots. If the camera sees a person at 10 meters, IR LEDs may be enough and may even look softer on skin. If the same person moves to 80 meters, the laser may be better. The system should switch because the scene needs it, not because a timer says so. I also like systems that keep ONVIF8 and RTSP output stable during the switch, because integrators hate stream drops. For David Miller type buyers, this is a key point. They want the video to stay compatible with Milestone, Blue Iris, or other VMS tools. So the switch should be invisible to the platform. The user should only notice one thing: the face stays clear.
Conclusion
I want close-range night vision to stay clear, controlled, and useful, and the best systems do that with smart power, smart exposure, and smart switching.
1. Overview of laser PTZ camera technology and its night vision capabilities. ↩︎ 2. How artificial intelligence optimizes camera exposure in real time for better facial detail. ↩︎ 3. Technology that reduces lens flare and overexposure from bright objects like faces. ↩︎ 4. Computer vision technique that identifies human faces in images, used to trigger adaptive exposure. ↩︎ 5. Explanation of retroreflective materials and their effect on night vision cameras. ↩︎ 6. Feature that limits laser output for short-range scenes to avoid overexposure and extend device life. ↩︎ 7. Infrared LEDs provide softer illumination for near-range scenes, complementing laser. ↩︎ 8. Open standard for IP-based security products, ensuring interoperability and stable video streams. ↩︎ 9. Technology that synchronizes optical zoom with laser beam angle to optimize illumination at different distances. ↩︎ 10. Artificial intelligence used in camera systems for scene analysis and adaptive control. ↩︎